How to Create Profiles in Safari on Mac
Ever felt the need to separate your work-related browsing from your personal internet adventures? With macOS Sonoma, you can now create multiple profiles in Safari to do just that. This blog post will guide you through the steps to set up and use multiple profiles in Safari.
Why Use Multiple Profiles?
Having multiple profiles allows you to segregate your browsing activities. For instance, you can have one profile for work where all your professional bookmarks and extensions are stored, and another for personal use, where your social media and entertainment websites live.
Steps to Create Multiple Profiles in Safari
Open Safari Settings
First, open Safari and go to Safari settings. You can access this by clicking on “Safari” in the menu bar and then selecting “Settings”
Go to Profiles Tab
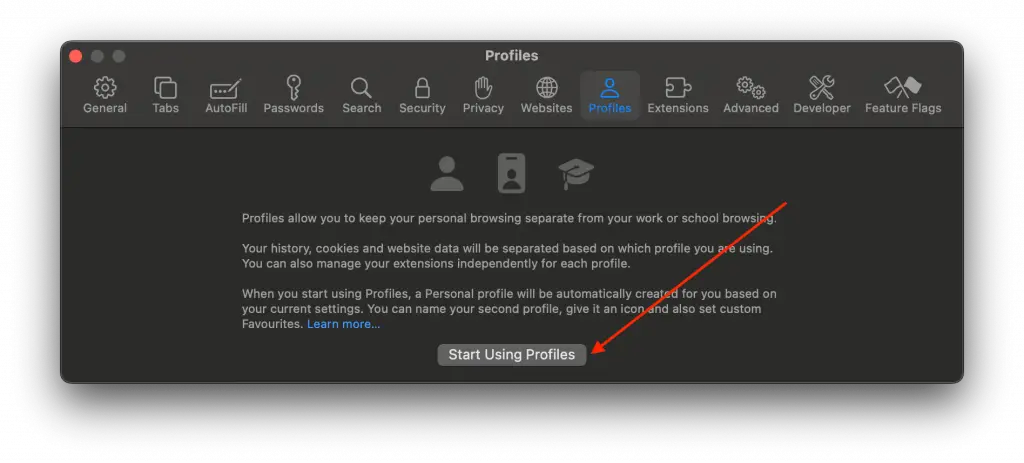
In the settings window, navigate to the “Profiles” tab.
Click “Start Using Profiles”
Here, you’ll see a button labeled “Start Using Profiles.” Click on it.
Customize Your Profile
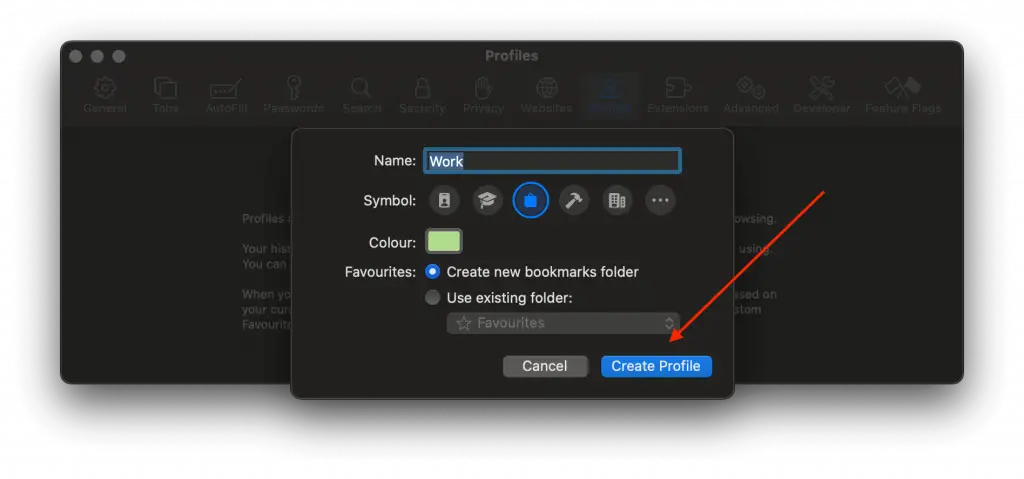
A new window will appear where you can choose a name, symbol, and color for your profile. Fill in these details to your liking.
Create Profile
Once you’re satisfied with your customizations, click the “Create Profile” button. You’ve now created a new profile in Safari!
Customize Further
After creating a profile, you can customize general settings and even choose which extensions to use with that profile.

Switching Between Profiles
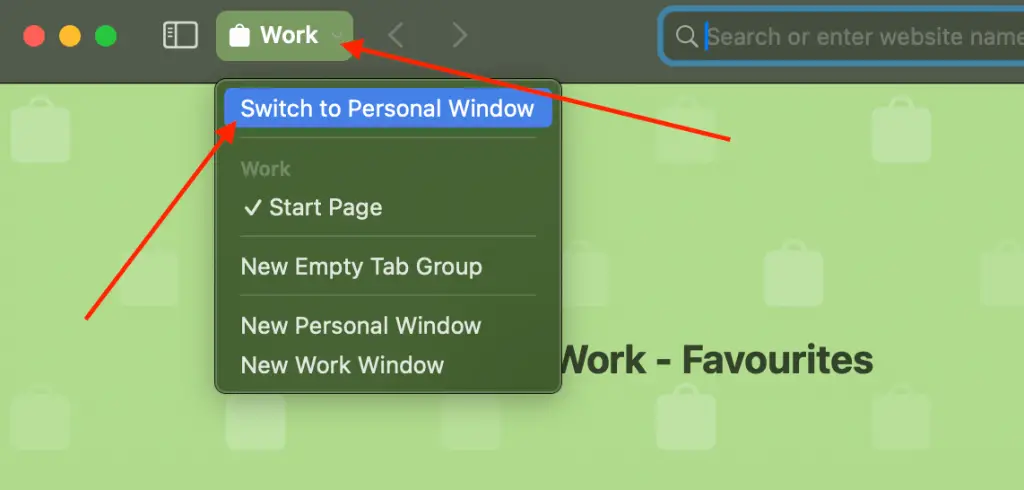
Switching profiles is straightforward. On the left top corner of the Safari window, you’ll find a dropdown. Just click on it, and you can easily switch between different profiles.
Creating multiple profiles in Safari on macOS Sonoma is a simple yet effective way to keep your work and personal browsing separate. Whether it’s to keep your bookmarks organized or to use different extensions, Safari profiles offer a great solution.
