How to Create Numbered Lists in Apple Notes
Organizing information in a structured format is a breeze with the Apple Notes app, which offers a convenient way to create numbered lists. Whether you’re jotting down procedures, prioritizing tasks, or outlining a project, a numbered list can be incredibly useful.
Let’s break down how to create one in Apple Notes on your Mac. Follow the steps given below.
Open Apple Notes
First, open your Apple Notes app. You can do this by clicking on its icon in the Dock, finding it in your Applications folder, or using the Spotlight search by pressing Command + Space and typing “Notes.”
Select or Create a Note
In the Apple Notes app, choose the note where you want to add a numbered list. If you’re starting fresh, click on the ‘New Note’ icon.
Initiate the Numbered List
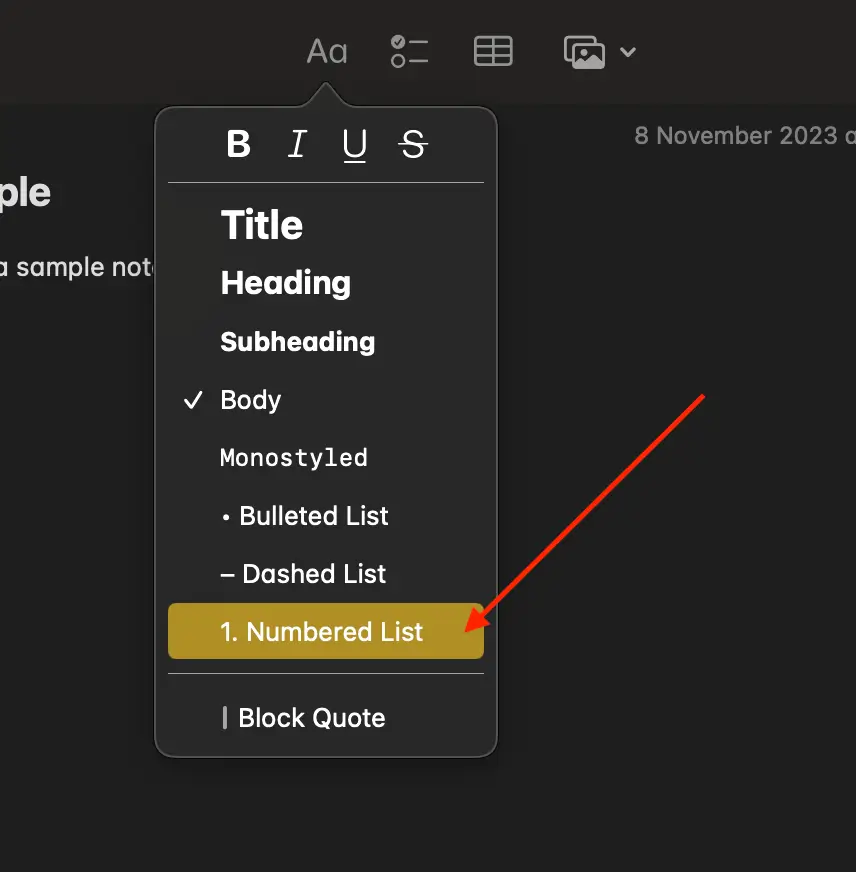
To begin your list, click into the body of your note where you want to start. Then, look for the formatting options in the Notes toolbar. You will see an icon resembling a ‘Aa’ – click on it and choose ‘Numbered List’ from the options.
Keyboard Shortcut
Another way to create numbered list in Apple note is by using the keyboard shortcut Shift + Command + 9.
Formatting Your List
While creating your list, you might want to indent items to create subpoints. To do this, simply hit the Tab key after creating a new item. To decrease the indent, Shift + Tab will bring you back to the higher level. These shortcuts allow you to create structured lists that are easy to follow.
Creating a numbered list in Apple Notes is a straightforward task that can significantly improve the clarity and organization of your information. Whether you’re planning an event, tracking a project, or creating an agenda, numbered lists are an essential tool for any Apple Notes user.