Enhance Your PDFs: A Guide to PDF Annotation on Mac
In today’s digital age, PDF documents have become a universal standard for sharing information. While their compatibility and accessibility are incredibly helpful, sometimes you need to interact with these documents in more ways than simply viewing them.
This is where annotation comes in. This blog post will guide macOS users through the process of annotating PDF documents using the built-in Preview application, Adobe Acrobat Pro, and other alternative tools.
Annotating with macOS’s Preview
As a Mac user, you have a powerful tool at your fingertips – the Preview app. Beyond just viewing PDFs, Preview offers a host of annotation features that are both versatile and easy to use.
Step 1: Open Your PDF in Preview
Locate your PDF file and open it with Preview. If it doesn’t open by default, right-click on the file, select ‘Open With’, and choose ‘Preview’.
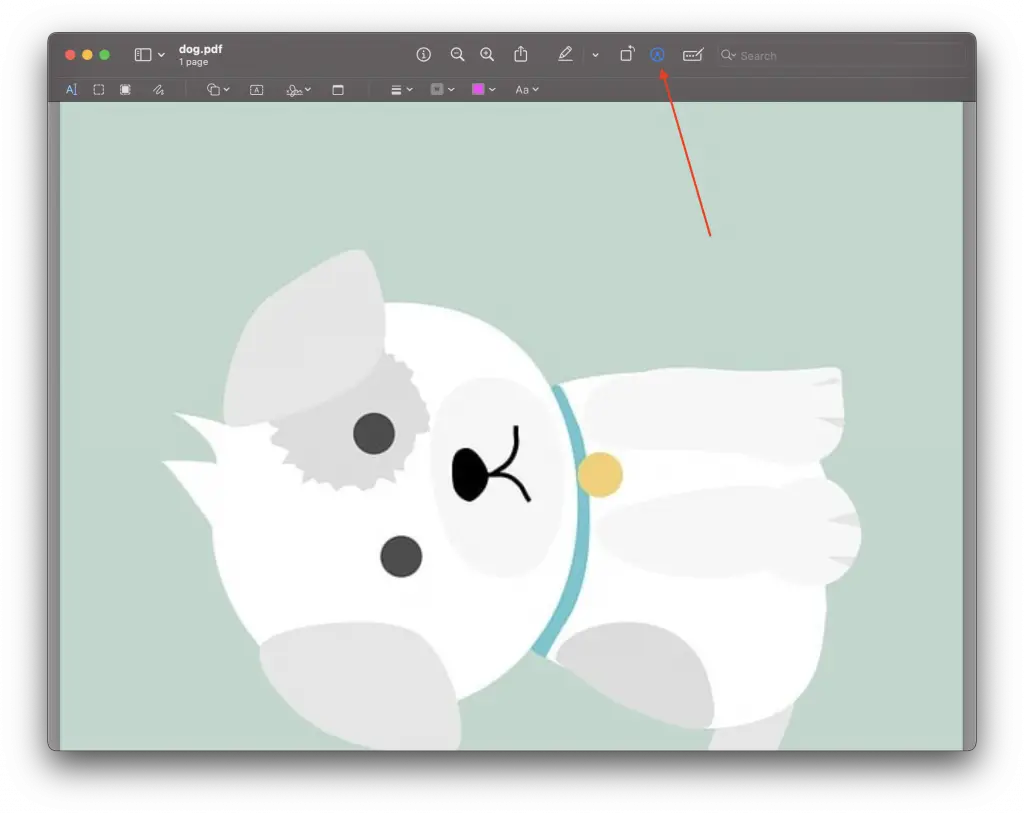
Step 2: Access the Markup Toolbar
Once your document is open in Preview, you can access the Markup Toolbar by clicking the Markup icon (a pen within a circle) on the main toolbar.
Step 3: Annotate as Desired
From the Markup Toolbar, you can highlight text, draw shapes, add text or notes, and even sign documents. Choose the tool that suits your needs, select the area on the document you want to annotate, and you’re good to go!
Annotating with Adobe Acrobat Pro
For a more advanced annotation experience, Adobe Acrobat Pro is a great choice. It offers a robust set of annotation tools that go beyond what Preview offers.
Step 1: Open Your PDF in Adobe Acrobat Pro
Start by opening your PDF document in Adobe Acrobat Pro.
Step 2: Access the Comment Tool
Navigate to the ‘Comment’ tool in the right-hand panel. Clicking it opens a toolbar at the top of the document, offering several options for annotation.
Step 3: Annotate as Needed
Here you can highlight text, add sticky notes, strike-through or underline text, and even measure distances and areas for PDFs containing plans or maps. Simply choose your preferred tool and apply it to the desired area on your document.
Alternatives for PDF Annotation on Mac
If you are looking for more annotation features or prefer something different from Preview and Adobe Acrobat Pro, several alternative PDF annotation tools are available for Mac users. Applications like PDFelement, Skim, and PDF Expert offer their unique takes on PDF annotation, each with its unique set of features and user interfaces.
Tips for Efficient PDF Annotation
Regardless of the tool you choose, here are some tips for efficient PDF annotation:
- Familiarize Yourself with Shortcut Keys: Most annotation tools support shortcut keys, which can significantly speed up the annotation process.
- Make Use of Customization Options: Many tools allow you to customize the color, opacity, and thickness of your annotations. Use this to develop an annotation color-code system that works for you.
- Use Sticky Notes for Detailed Comments: When a simple highlight or underline won’t suffice, use sticky notes to jot down your thoughts without cluttering the document.
- Save Regularly: While most tools auto-save your work, it’s a good habit to save regularly to prevent losing your annotations.
- Be Mindful of File Size: Extensive annotations, especially those involving images or stamps, can increase your PDF’s file size. If necessary, look into options for reducing the file size.
Whether you’re reviewing a document for work, studying for an exam, or reading for pleasure, being able to annotate your PDFs can enhance your interaction with documents. Thankfully, as a macOS user, you have a range of tools at your disposal for this purpose, each offering its unique advantages.
With this guide, you’ll be able to navigate these tools and make the most out of your PDF annotation experience. So, get annotating, and take your document interaction to the next level!