How to Change Siri Language on Mac
Are you a multilingual Mac user who loves Siri but wishes you could interact with it in a different language? Or perhaps you’ve just relocated to a new country and want Siri to better understand your local dialect.
Changing Siri’s language on your Mac is an easy process. This detailed guide will walk you through the steps you need to follow.
Why Change Siri’s Language?
Changing Siri’s language can serve multiple purposes:
- Ease of Use: You might be more comfortable interacting with your devices in your native language.
- Accessibility: Multilingual users can tailor the system to their language needs.
- Localization: If you’ve moved to a new country, adjusting Siri’s language can help you integrate faster and make the assistant more effective.
Steps to Change Siri Language on Mac
There are two primary methods to change the language of Siri on your Mac. Here they are:
Via System Settings
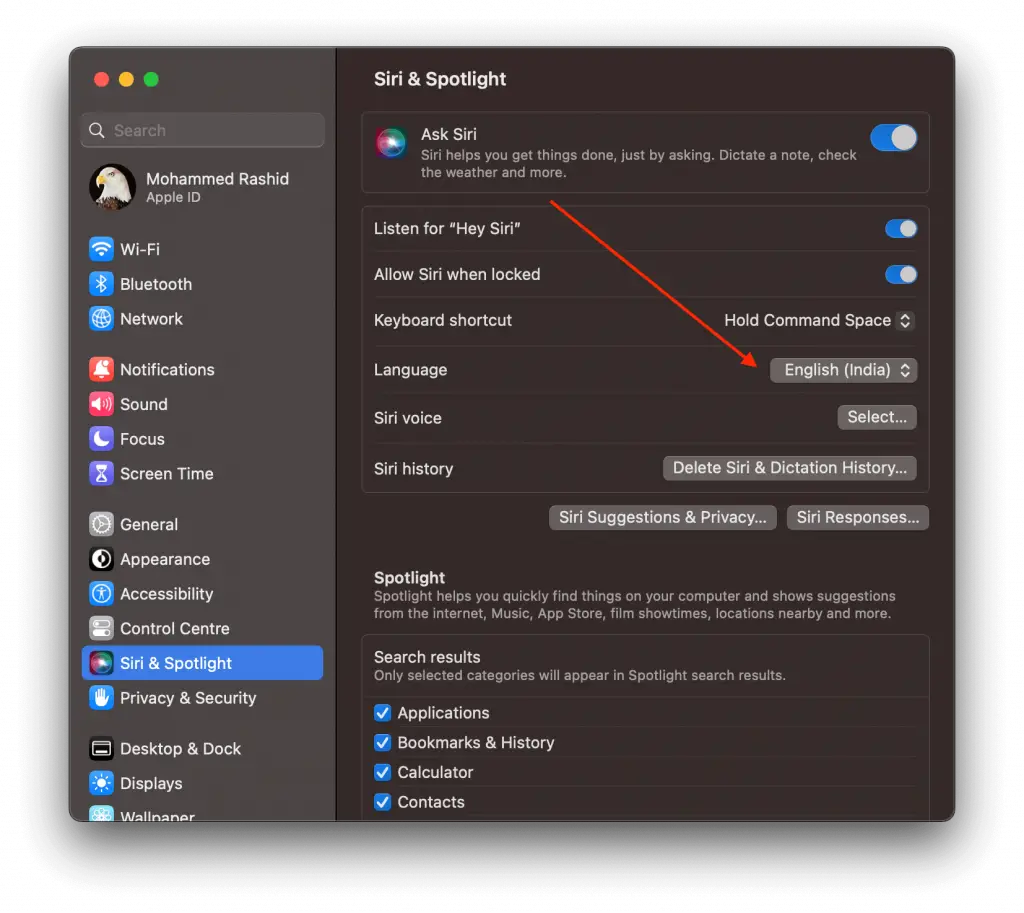
- Open System Settings: Click the Apple icon in the top-left corner of your screen, and select “System Settings”.
- Access Siri Settings: Find and click on the “Siri & Spotlight” option within the System Settings window.
- Change Language: In the Siri preferences window, you’ll see a dropdown menu labeled “Language.” Click on it and select the language you prefer.
- Confirmation: After you select a new language, you may be prompted to download a new voice file for Siri. Confirm the download and wait for it to complete.
Changing Siri’s language on your Mac is a straightforward task. Whether for ease of use, accessibility, or localization, tailoring Siri’s language to your needs can enhance your overall experience.
Keep in mind that changing the language will also affect Siri’s voice, so you might need some time to get used to the new settings.