How to Use the Back Shortcut in Mac Finder for Improved Navigation
Navigating through folders and files using Finder on your Mac can be a breeze if you know the right shortcuts. One such shortcut is the back shortcut, which allows you to quickly navigate back to the previous folder or screen.
In this blog post, we will discuss how to use the back shortcut in Mac Finder, making it easier and more efficient to manage your files.
Back Shortcut in Mac Finder
- Open Finder on your Mac.
- Navigate through your folders and files.
- To go back to the previous folder or screen, press the Command (⌘) key and the left square bracket ([) key simultaneously.
- Alternatively, you can use the two-finger swipe gesture on your trackpad or Magic Mouse to navigate back.
- To go forward to the next folder or screen, press the Command (⌘) key and the right square bracket (]) key simultaneously.
- This can also be done using the two-finger swipe gesture on your trackpad or Magic Mouse, but in the opposite direction.
How to Add Back and Forward Buttons to the Finder Toolbar
If you prefer using buttons for navigation, you can add the Back and Forward buttons to the Finder toolbar.
- Open Finder on your Mac.
- Right-click (or Control-click) on the Finder toolbar, and then click Customize Toolbar.

- Drag the Back and Forward buttons to the desired location on the toolbar.
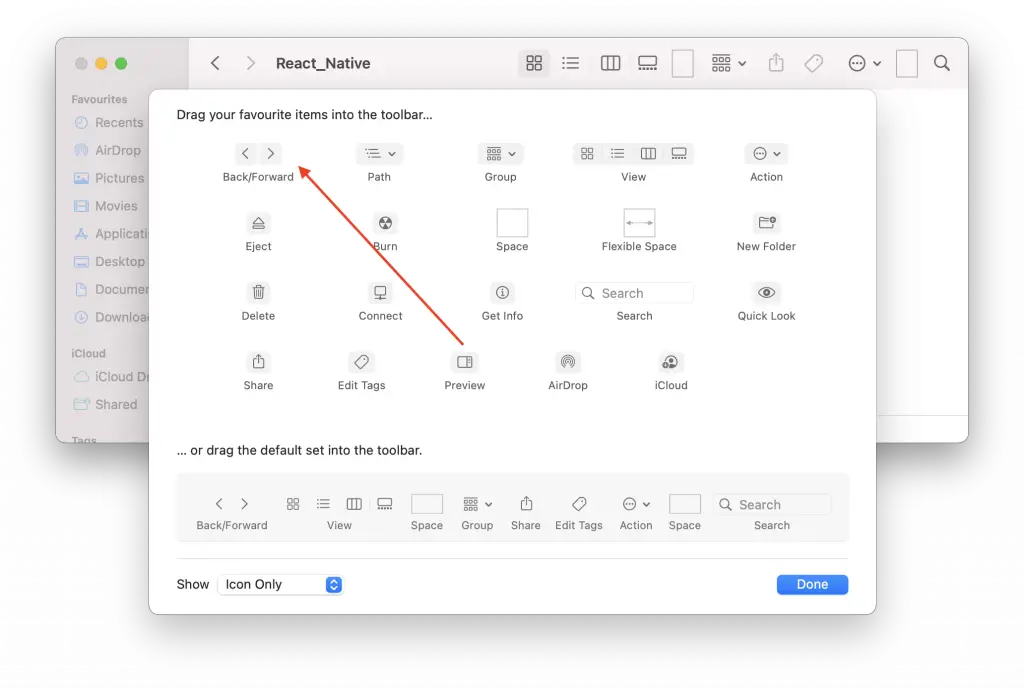
- Click Done to save your changes.
Now you can use these buttons to easily navigate back and forth in Finder.
Using the back shortcut in Mac Finder is a simple yet effective way to improve your file navigation experience. Whether you prefer keyboard shortcuts or customizable toolbar buttons, these techniques will help you work more efficiently and keep your files organized.