How to Reduce Image Size on macOS
In the digital age, images form an essential part of our lives, from professional use cases like website design and content creation to personal uses like sharing memories with friends on social media. However, large image files can take up significant storage space and can be challenging to send via email or upload to the web due to size restrictions.
Therefore, knowing how to reduce image size without sacrificing quality is a crucial skill. If you’re a macOS user, this guide will show you two effective methods of reducing image size using built-in tools.
Reduce Image Size Using Preview
Preview is the default application for viewing images on macOS and offers a range of basic image editing functions, including resizing images. Here’s how to do it:
- Open the image in Preview: Find the image file on your Mac, right-click it, and select ‘Open With > Preview’.
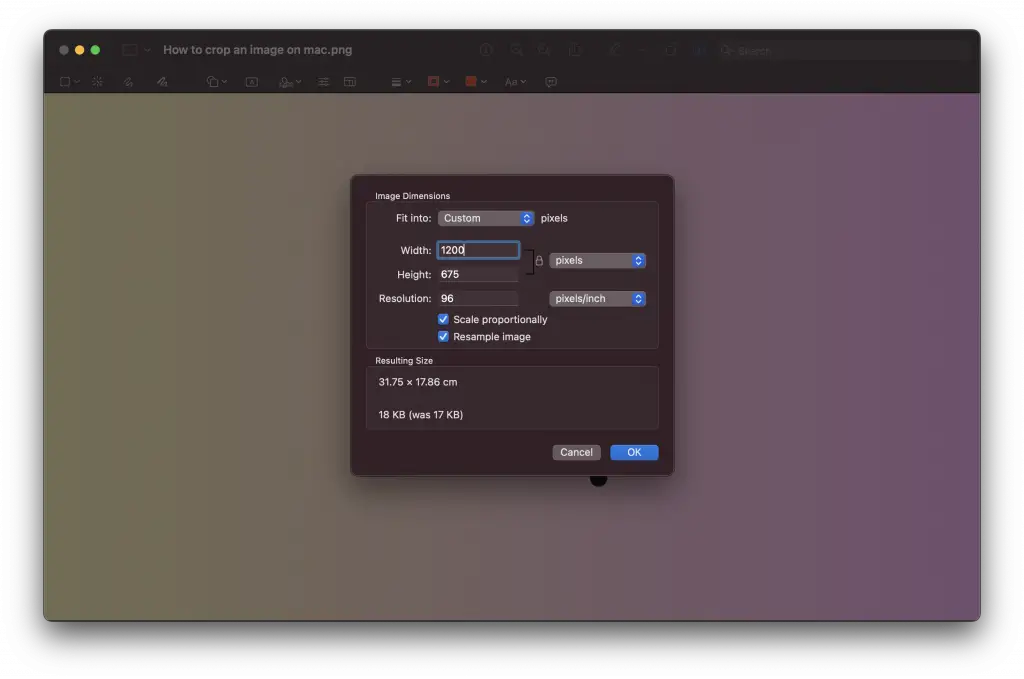
- Open the ‘Adjust Size’ window: In Preview, click on the ‘Tools’ menu and select ‘Adjust Size’.
- Adjust the image dimensions: In the ‘Adjust Size’ window, you can modify the image’s width and height. Remember, decreasing these values will reduce the file size. Also, ensure ‘Scale Proportionally’ is checked to keep the image’s aspect ratio intact.
- Save your changes: Once you’re satisfied with the new dimensions, click ‘OK’. Then go to ‘File > Save’ to apply the changes. If you want to keep the original file intact, use ‘Save As’ instead.

Reducing image size on your Mac doesn’t require any additional software or complex procedures. The Preview application can help you accomplish this task with minimal effort. Always remember to maintain a balance between file size and image quality when resizing images, and keep backups of your original files whenever possible.


