How to Use Strikethrough in Notes on Mac
Strikethrough is a handy feature for marking text, indicating that something has been completed, or for a simple visual effect. If you’re using the Notes app on your Mac, you might wonder how to apply the strikethrough effect to your text.
This blog post will walk you through the steps to use strikethrough in Notes on your Mac.
Steps to Apply Strikethrough in Notes
- Open Notes App: Launch the Notes app on your Mac. You can do this by clicking on the Notes icon in your Dock or by searching for it in Spotlight.
- Choose Your Text: In your note, highlight the text that you want to apply strikethrough to by clicking and dragging your cursor over it.
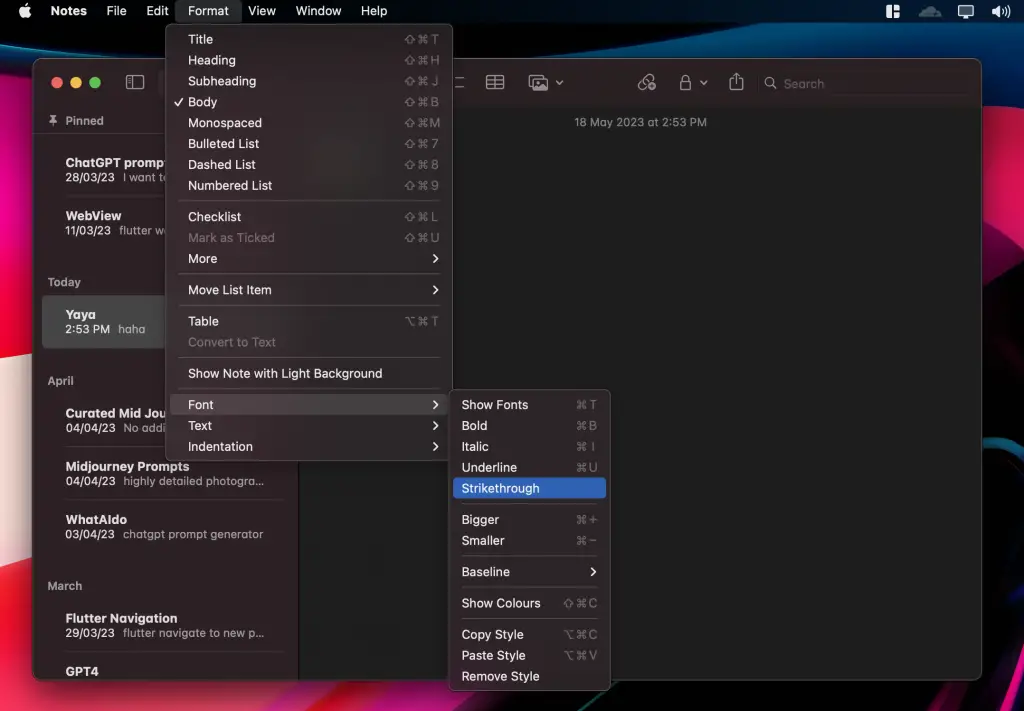
- Apply Strikethrough: With the text highlighted, click on the Format option in the menu bar at the top of the screen. In the drop-down menu, go to Font and then select Strikethrough.
And there you have it! Your selected text should now be crossed out with a line, indicating a strikethrough effect.
Strikethrough is a great tool for various scenarios. You can use it when making to-do lists to mark tasks as done, or use it as an editing tool to indicate text that needs to be removed or has been replaced.
Mastering formatting tools like strikethrough can help improve your productivity and make your notes more effective. The Notes app on your Mac provides these tools to help you customize your notes to fit your needs.