How to Add Signature to PDF on Mac
Signing documents in person can be a time-consuming process, particularly if you’re dealing with numerous pages or need to mail the document to a different location. Fortunately, Mac users can add their signature to a PDF digitally, making the process much more efficient and straightforward.
This blog post will guide you through various methods of doing so, including using the built-in Preview app, Adobe Acrobat, and third-party tools.
Adding a Signature using macOS’s Preview
Mac’s Preview app is not only a PDF and image viewer but also provides several useful markup tools, including a feature that allows you to add your signature to a document.
Step 1: Create Your Signature
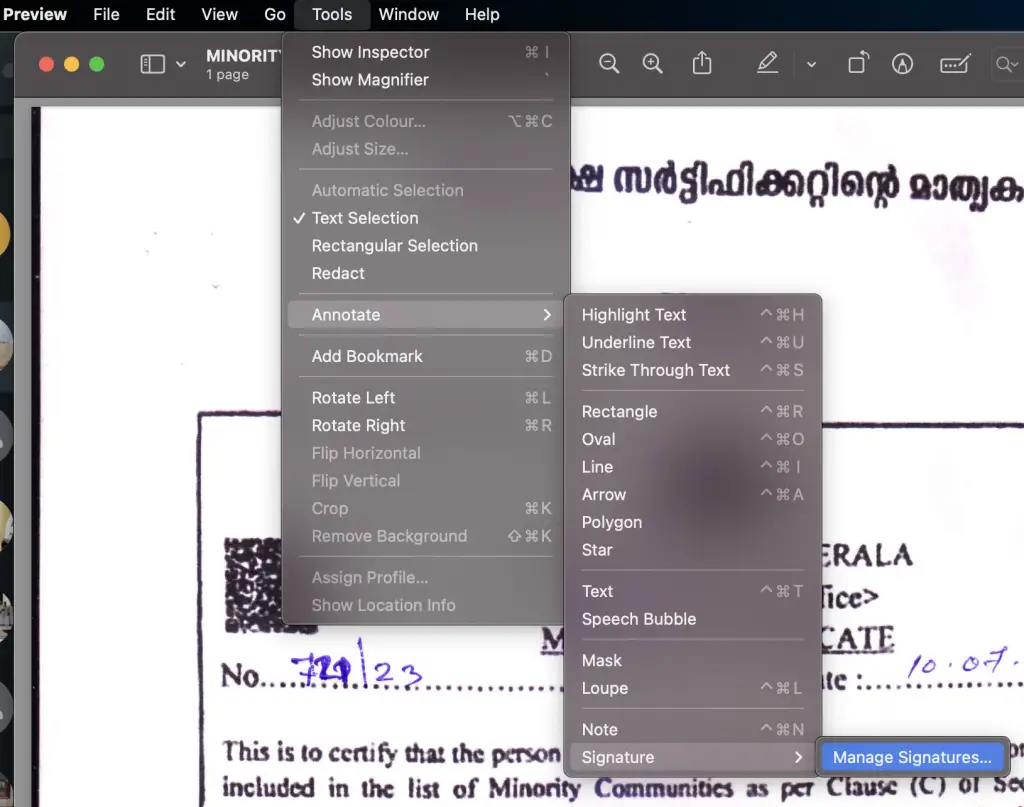
Before you can add your signature to a PDF, you’ll need to create it in Preview. Open Preview, click on the ‘Tools’ menu, select ‘Annotate’, then ‘Signature’, and ‘Manage Signatures’. Here, you can create a signature using either your Mac’s trackpad or by capturing a written signature using your Mac’s camera.
Step 2: Open Your PDF in Preview
Once you’ve created your signature, open the PDF you wish to sign. If Preview isn’t set as your default PDF viewer, right-click on the PDF, select ‘Open With’, and choose ‘Preview’.
Step 3: Add Your Signature
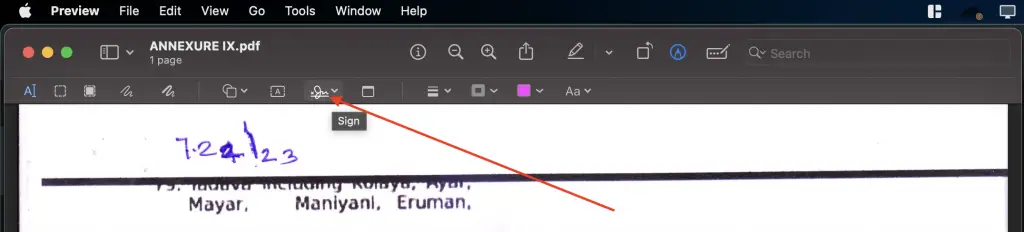
To add your signature to the PDF, click on the toolbox icon to open the markup toolbar. Click on the signature icon (a squiggly line) and select the signature you wish to add. You can then click on the document where you want to place the signature and adjust its size and position as needed.
Adding a Signature using Adobe Acrobat
Adobe Acrobat offers a more robust solution for signing PDFs and includes additional features such as the ability to send documents for others to sign.
Step 1: Open Your PDF in Adobe Acrobat
Launch Adobe Acrobat and open the PDF document you wish to sign.
Step 2: Access the Fill & Sign Tool
Once your PDF is open, find the ‘Fill & Sign’ option in the right-side tools panel and click on it.
Step 3: Add Your Signature
In the ‘Fill & Sign’ toolbar, you’ll see a ‘Sign’ option. Click on it and you will be given the choice to add a signature or initials. If you haven’t already created a signature, you can do so here. Once your signature is ready, you can add it to your document.
Alternative Tools for Signing PDFs on Mac
There are several third-party tools available for Mac users that can add signatures to PDFs. Tools such as DocuSign, PDFpenPro, and PDFelement offer robust features for not only signing documents but also for requesting signatures from others.
Tips for Signing PDFs on Mac
Keep the following tips in mind when signing PDFs on your Mac:
- Create a Clear Signature: Make sure your signature is clear and visible, especially if you’re using your trackpad to create it.
- Choose the Right Tool: If you frequently need to sign documents or require others to sign them, a dedicated tool like Adobe Acrobat or DocuSign may be more suitable than Preview.
- Secure Your Signature: Remember that your digital signature is as legally binding as a written one, so keep it secure and don’t share access with others.
Digital signatures save time, paper, and offer a high level of convenience, especially for remote work. Mac users have several options at their disposal for adding signatures to PDFs, making the process simple and accessible to all.
Whether you prefer the simplicity of Preview or the comprehensive features of Adobe Acrobat, you’ll find a solution that meets your needs.