How to Turn on Dark Mode on Mac
Are you looking for ways to make your Mac’s interface more visually appealing and easier on the eyes? Dark Mode is an excellent feature that not only adds a touch of sophistication to your screen but also helps reduce eye strain, particularly during night time or in low-light environments.
In this blog post, we will guide you through the steps to turn on Dark Mode on your Mac, making your user experience more enjoyable and comfortable.
How to Enable Dark Mode on Mac
For macOS Ventura or Later
If you’re using macOS Ventura or a later version, follow these steps:
- Click on the Apple menu located at the top-left corner of your screen.
- Select System Settings from the dropdown menu.
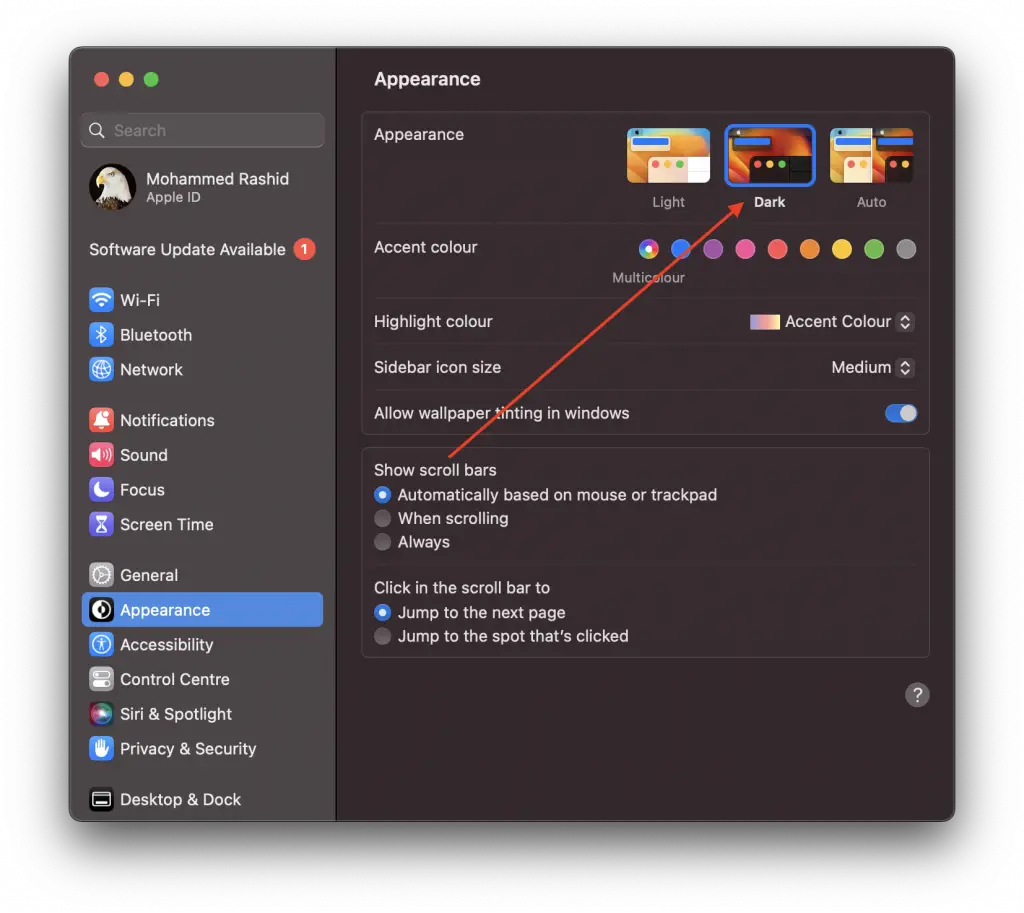
- From the sidebar, click on Appearance.
- At the top of the window, you’ll find the Appearance options. Here, you can select your preferred mode:
- Light: This option uses the light appearance.
- Dark: This option switches to the dark appearance.
- Auto: This option automatically switches between light and dark modes, using the light appearance during the day and the dark appearance at night.
For Earlier Versions of macOS
If your Mac runs on an earlier version of macOS, here’s how you can enable Dark Mode:
- Click on the Apple menu at the top-left corner of your screen.
- Choose System Preferences from the dropdown menu.
- Click on General.
- At the top of the window, you’ll find Appearance options. Choose your preferred setting:
- Light: Uses the light appearance.
- Dark: Changes to the dark appearance.
- Auto: Automatically switches between the light appearance during the day and the dark appearance at night.
Dark Mode is a valuable feature for many Mac users who seek a visually soothing and stylish appearance. Whether you’re working late into the night or simply prefer the darker aesthetics, it’s an easy process to switch between the light and dark modes on your Mac device.