How to Fade an Image in Canva
Do you want to add a subtle, professional touch to your graphics? Fading an image is a simple way to create depth and visual interest. In this blog post, let’s learn how to fade an image in Canva.
The fade effect is a technique used in design to gradually make an image or text element less visible or see-through. It’s a subtle way to make designs look more interesting and professional.
The fade effect is commonly used on websites, social media posts, and other digital graphics. Canva has a tool that makes it easy to add a fade effect to any image.
Follow the steps given below to fade an image in Canva.
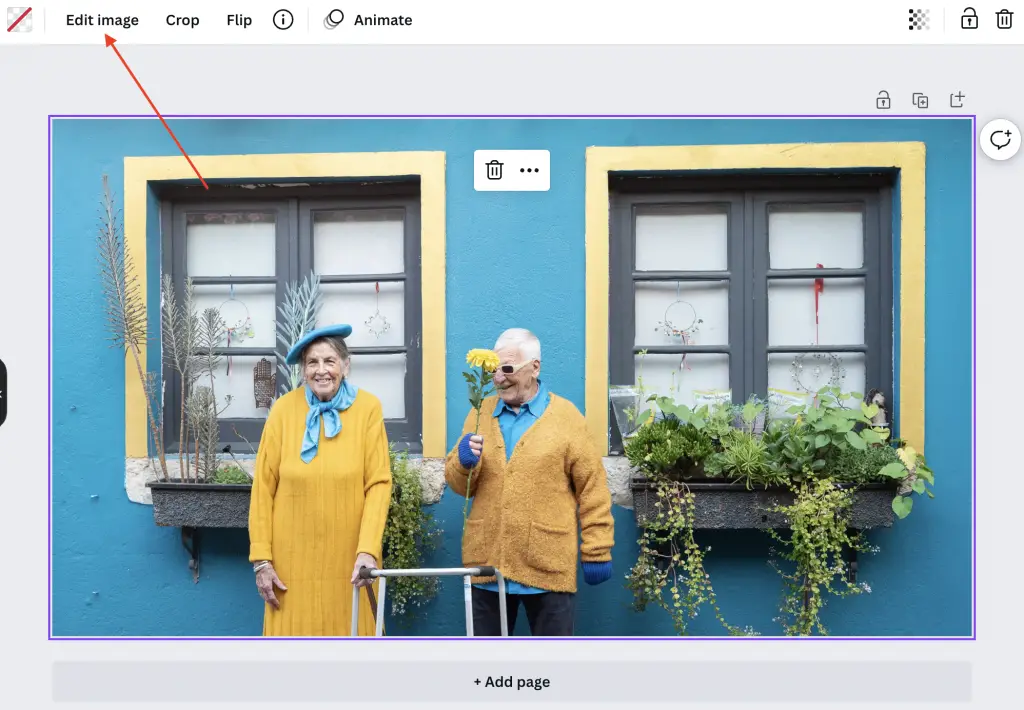
- Open the image and click on the Edit image option from the left top.
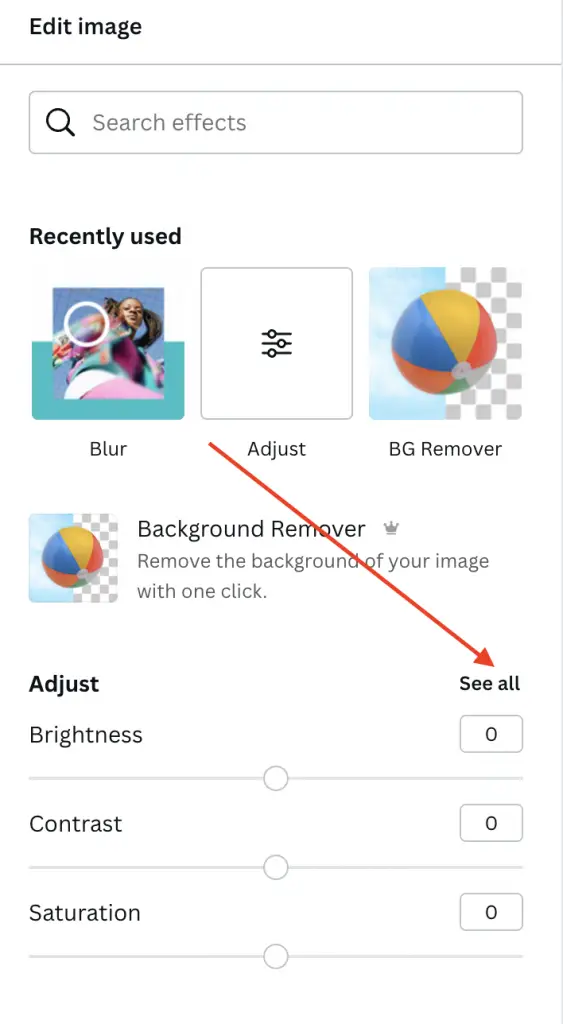
- From the left pane choose see all option from the Adjust section.
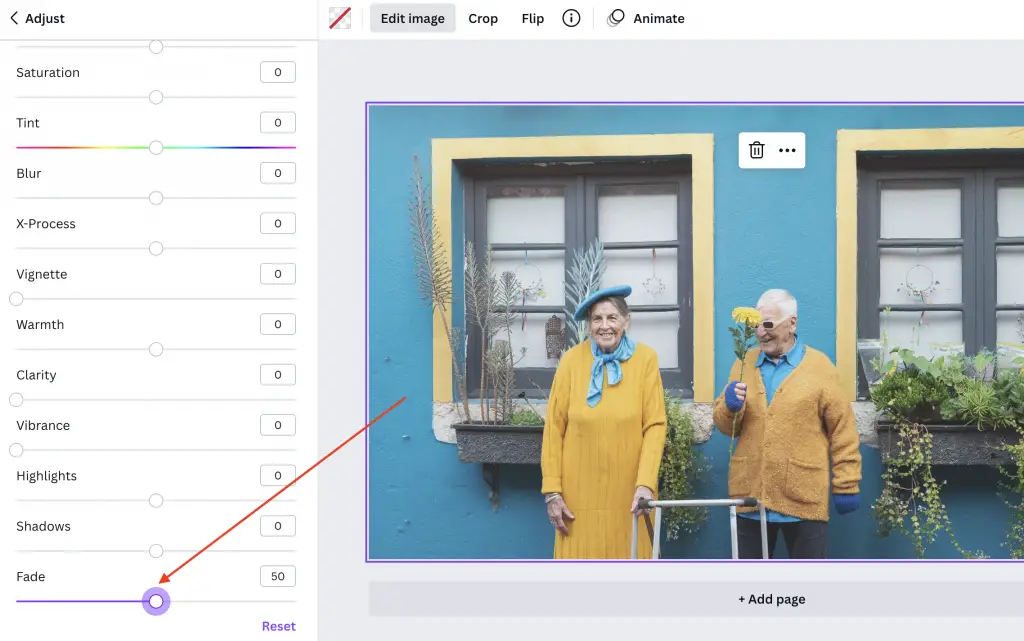
- Then scroll down and you can see the Fade menu. You can adjust the slider to increase or decrease the fade effect.
Now that you know how to fade an image in Canva, you can create beautiful graphics with more depth and interest. Experiment with different levels of opacity and blending modes to find the perfect effect for your design.
If you want a blur effect instead of a fade effect then go through how to blur image in Canva blog post.
