How to Resize Images on Mac
Resizing images is a common task, whether you’re a designer, a photographer, or a casual user trying to save storage space. On macOS, there are multiple ways to achieve this, using either built-in tools or third-party applications.
This blog post will walk you through various methods of resizing images on your macOS device, making the process simple and efficient.
Method 1: Using Preview
Preview is a built-in macOS application that allows you to view and edit images and PDFs. Here’s how you can use Preview to resize an image:
- Open the image you want to resize in Preview.
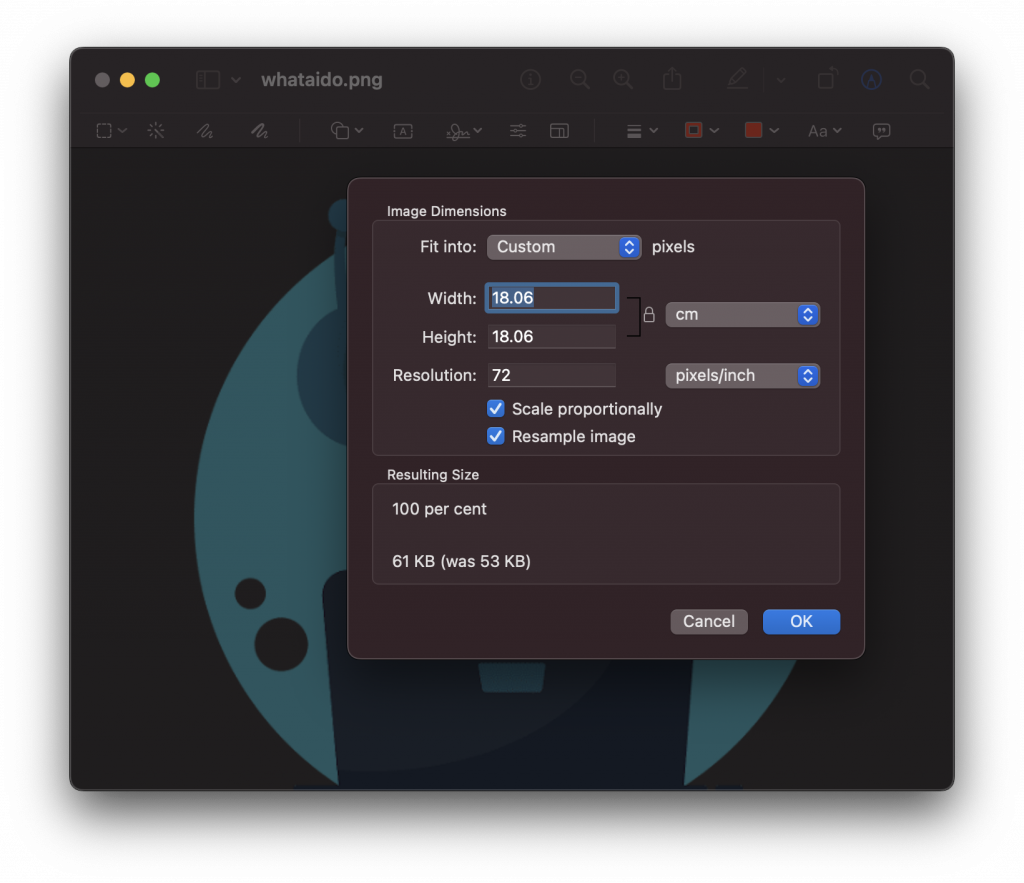
- Click on “Tools” in the menu bar and select “Adjust Size”.
- Enter your desired dimensions or resolution, ensuring “Scale Proportionally” is checked to maintain the image’s aspect ratio.
- Click “OK”, then save your resized image.
Method 2: Using Third-party Applications
Third-party applications such as Adobe Photoshop, GIMP, and Pixelmator provide more advanced options for resizing images. Most of these apps offer features like resizing by percentage, maintaining image quality, and batch resizing. They may come at a cost, but they provide a higher degree of control over the image resizing process.
Resizing images on macOS is a breeze, thanks to the various built-in and third-party tools available. Depending on your needs, you can choose from the simple resizing functionality of Preview or the advanced features of professional photo editing software. With these tools at your disposal, image resizing becomes a quick and effortless task.