How to Use Dictation in Apple Notes
Taking notes the traditional way—by typing—works well for many people, but what if you could dictate your notes instead? Whether you’re on the go, multi-tasking, or simply want a break from the keyboard, using dictation in Apple Notes offers a convenient alternative.
In this blog post, I’ll walk you through how to use this feature on macOS.
Why Use Dictation?
Before we dive into the steps, let’s explore some benefits of using dictation:
- Efficiency: Speaking is generally faster than typing, saving you time.
- Accessibility: For those with mobility impairments, dictation offers an easier way to take notes.
- Hands-Free: Whether you’re cooking or driving, dictation allows you to take notes without needing to use your hands.
Use Dictation in Apple Notes
Here’s how to dictate notes on a Mac:
- Open Notes: Launch the Apple Notes app and open a new or existing note.
- Cursor Position: Place the cursor where you want the dictated text to appear.
- Press ‘Fn’ + ‘D’: Quickly press the ‘Fn’ (Function) key + ‘D’ to start dictation.
- Start Speaking: Speak your notes clearly into the microphone. Press ‘Fn’ + ‘D’ again to stop.
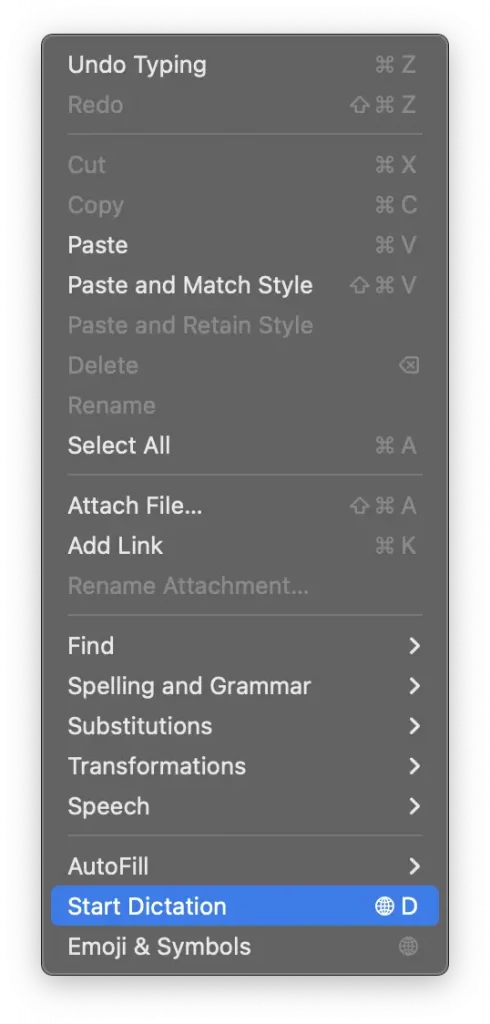
- Alternatively, you can go to the ‘Edit’ menu and choose ‘Start Dictation’.
Using dictation in Apple Notes is an excellent way to take quick, hands-free notes. The process is simple and offers several advantages, from increased efficiency to better accessibility.