How to Enable Line Numbers in Obsidian Notes
Line numbers in a text editor can be a simple but powerful feature. Whether you are writing code, creating lists, or trying to debug a problem in your notes, line numbers can come in very handy. In this detailed guide, we’ll walk you through how to enable line numbers in Obsidian Notes.
Why Enable Line Numbers?
Code Writing and Debugging
If you’re writing code or scripts, line numbers help identify exactly where an error is located.
Reference Points
Line numbers make it easier to refer back to specific points in your note, especially in long documents.
Better Navigation
Navigating through your notes becomes much simpler when you have line numbers as guides.
How to Enable Line Numbers in Obsidian
Step 1: Open Obsidian Settings
- Launch the Obsidian app.
- Click on the gear icon at the lower-left corner to open the Settings menu.
Step 2: Navigate to the Editor Section
- In the Settings menu, you will find several categories listed on the sidebar.
- Click on the “Editor” option.
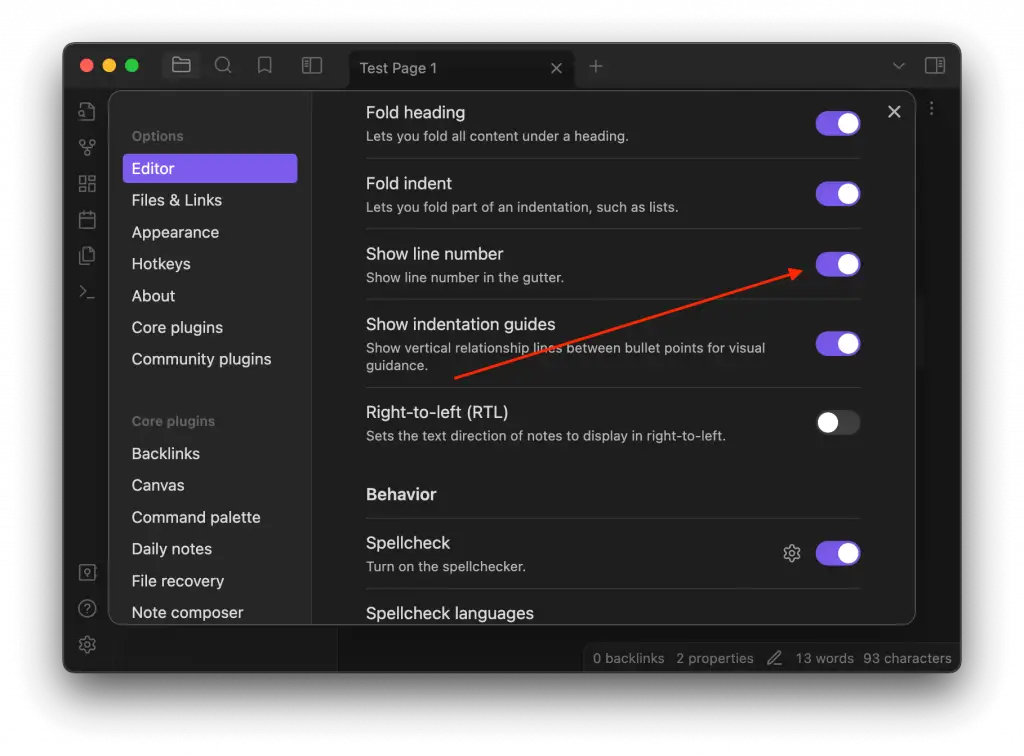
Step 3: Locate the ‘Show line number’ Toggle
- Once you’re in the Editor settings, scroll down to find a variety of options.
- Look for the toggle switch labeled “Show line number.”
Step 4: Enable Line Numbers
- Click on the toggle switch next to “Show line number” to enable it.
- The toggle switch will change color, usually to blue, indicating that the feature is now active.

Step 5: Verify the Change
- Go back to your note.
- You should now see line numbers appearing on the left-hand side of the editor.
Additional Tips
- If you want to temporarily hide line numbers, you can toggle the switch off and then back on when you need it again.
- Remember that enabling line numbers will affect all the notes in your vault, not just the current one.
Enabling line numbers in Obsidian Notes is a straightforward process, but the utility it provides can be immense. By following these simple steps, you can turn on line numbers and make your note-taking and coding tasks a bit easier.


