How to Enable Pop Ups in Safari Browser on Mac
Pop-up windows have long been a staple of the internet, but they can be both helpful and annoying. While many websites use pop-ups for legitimate purposes such as authentication or displaying additional information, they can also be misused for advertising or even phishing.
That’s why most browsers, including Safari on Mac, offer an option to block pop-ups by default. However, there might be instances where you need to enable pop-ups in Safari. This guide will show you how.
Why Enable Pop-Ups in Safari?
Here are some reasons you might want to enable pop-ups:
- Authentication: Some websites require pop-ups to sign in or verify your identity.
- Forms and Surveys: Websites may use pop-ups to collect feedback or additional data.
- Necessary Functionality: Some sites use pop-ups to deliver essential features.
Pre-requisites
Before you proceed, you’ll need:
- A Mac computer
- Safari browser installed and updated
Enable Pop-Ups Through Safari Settings
The most direct way to manage pop-ups in Safari is through its Preferences panel.
Step 1: Open Safari Preferences
Launch Safari and go to Safari > Settings in the menu bar, or simply press Command + ,.
Step 2: Navigate to Websites Tab
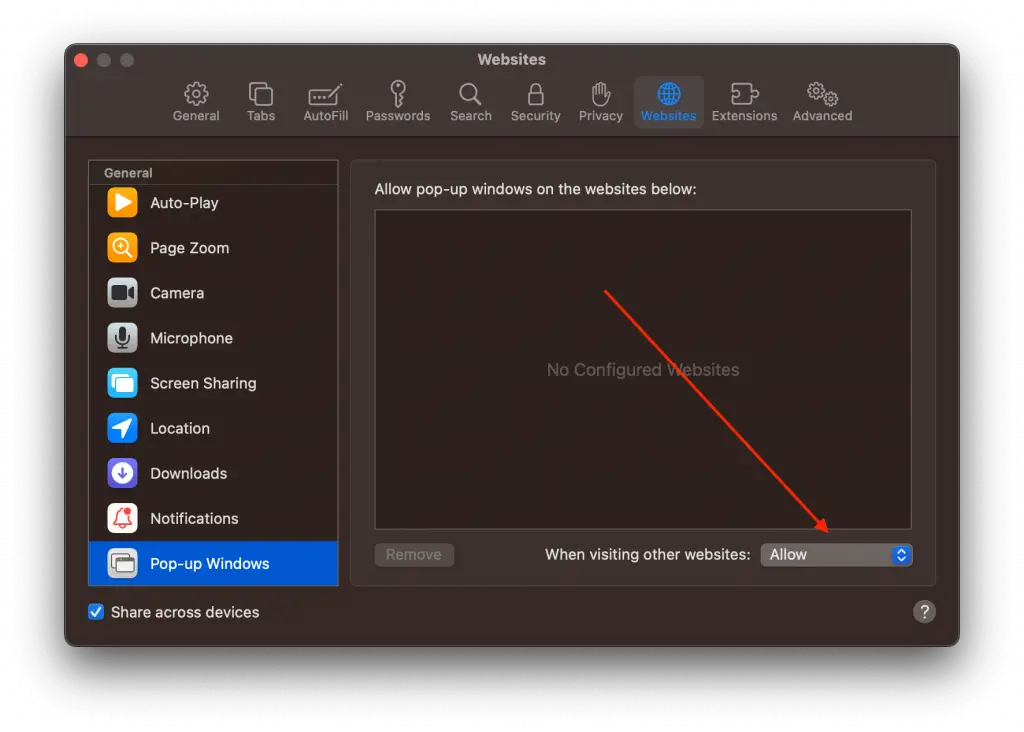
In the Preferences panel, click on the “Websites” tab.
Step 3: Manage Pop-Up Windows
On the left sidebar, you’ll find “Pop-up Windows” under the “Web content” section. You can then configure pop-up settings for specific websites or set a global preference.
Step 4: Enable Pop-Ups
Choose “Allow” from the dropdown to enable pop-ups for the selected website or for all websites.
Additional Tips
- Always be cautious when enabling pop-ups; they can sometimes be used for phishing scams or intrusive ads.
- If you experience issues after enabling pop-ups, try clearing your cache and cookies as a troubleshooting step.
Enabling pop-ups in Safari on your Mac is relatively straightforward and can be done either through the Preferences panel or directly from the toolbar for quicker access. Whether you need to enable them for specific tasks or for certain trusted websites, this guide has you covered.