How to Use Find and Replace in Apple Notes
The ‘Find and Replace’ function is a staple of word processing. It’s a quick way to locate specific text and replace it with something new. Apple Notes, while primarily a note-taking app, incorporates this helpful feature, allowing users to edit their notes with efficiency.
In this blog post, we’ll explore how to use the ‘Find and Replace’ feature in Apple Notes.
Why Use Find and Replace?
Whether you’re updating information, correcting errors, or rephrasing content within your notes, the ‘Find and Replace’ feature can save you from the tedious task of manually searching and editing.
How to Use Find and Replace in Apple Notes
Open Your Note
Launch the Apple Notes app and open the note you want to edit.
Access Find Feature
On a Mac, press Command + F to open the ‘Find’ bar.
Enter Search Term
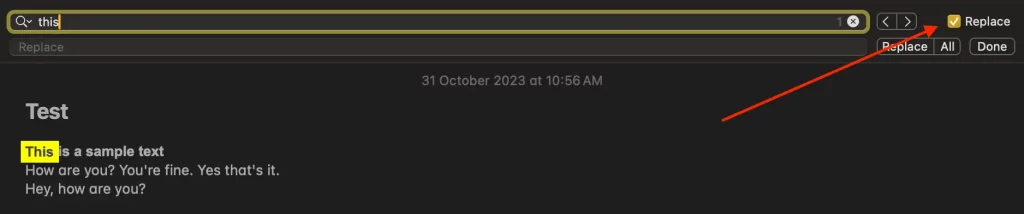
Type the word or phrase you’re looking to find in the ‘Find’ bar. Apple Notes will highlight all instances of this text in your note.
Initiate Replace Function
For Mac users, click the ‘Replace’ checkbox at the right end.
Enter Replacement Text
In the ‘Replace’ field, type the text you wish to use as a replacement.
Execute the Replacement
You can choose to replace occurrences individually by clicking ‘Replace’ or all occurrences by clicking ‘All’.
Additional Tips for Using Find and Replace
- Case Sensitivity: Be aware that ‘Find and Replace’ is case-sensitive. If it’s not finding your text, check the case.
- Check Your Work: Especially if you’re using ‘Replace All,’ check the changes to ensure they’re correct.
- Use Shortcuts: Learn the keyboard shortcuts for efficiency—
Command + Fto find andCommand + Gto cycle through occurrences.
The ‘Find and Replace’ feature in Apple Notes is a valuable tool for anyone looking to streamline their editing process within the app. It’s a simple yet powerful feature that can significantly cut down on the time you spend updating and refining your notes.