How to Add CSS Snippet to Obsidian
Obsidian is an exceptional note-taking tool that offers a wide array of features, including customization through CSS snippets. If you’ve ever wondered how to add a CSS snippet to Obsidian, you’re in the right place. This guide will provide a step-by-step walkthrough to help you achieve that.
Why Use CSS Snippets?
Adding CSS snippets to Obsidian allows you to:
- Customize the appearance of your workspace.
- Create a unique visual identity for your notes.
- Improve readability and focus.
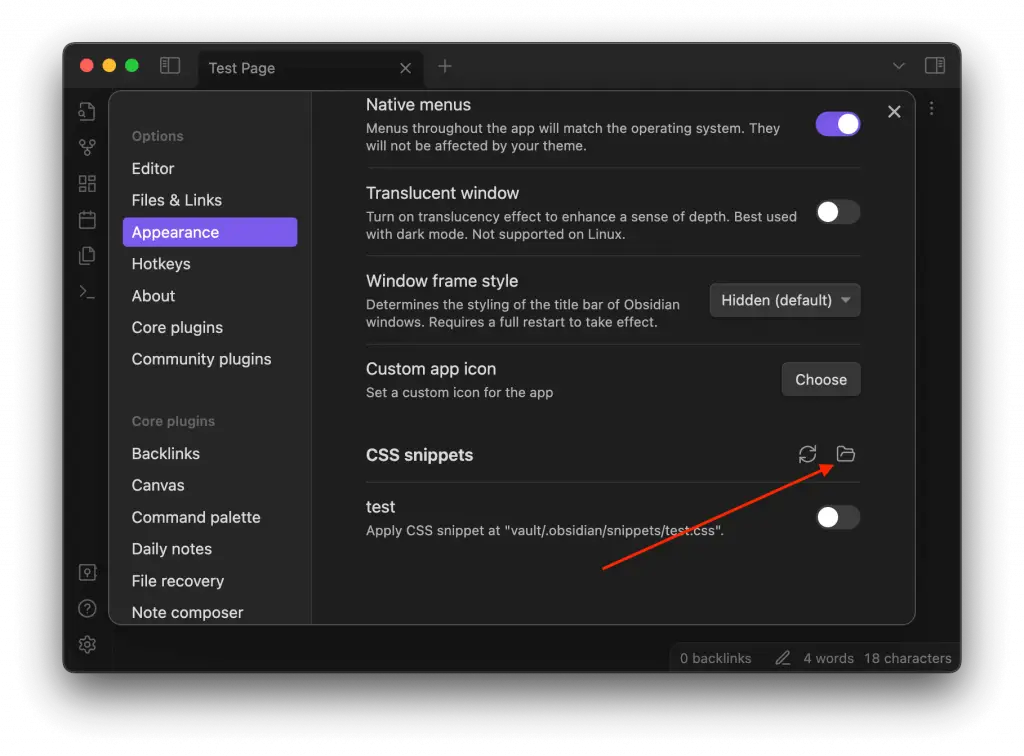
Add a CSS Snippet
Navigate to Obsidian Settings
First, open Obsidian and click on the gear icon at the bottom-left corner to access the settings.
Access the Appearance Section
Once in settings, look for the “Appearance” tab and click on it.
Go to CSS Snippets
Inside the Appearance section, you’ll find the “CSS Snippets” option. Here, you’ll see a folder icon to manage your CSS snippets. Click on it.
Create a New Snippet
Now create a new CSS file in the opened folder location. You can name this snippet whatever you like.
Enable the Snippet
After saving, go back to the CSS snippets list in Obsidian, reload the CSS snippet and toggle the switch next to your new snippet to enable it. Your changes should now be visible.
Tips for Working with CSS Snippets
- Start with simple modifications and gradually move to more complex ones.
- If something goes wrong, you can easily disable the snippet to revert the changes.
- You can have multiple snippets and toggle them on or off as needed.
Adding a CSS snippet to Obsidian is a straightforward process that can significantly enhance your note-taking experience. Whether you’re aiming for visual appeal or improved functionality, CSS snippets offer a powerful way to customize Obsidian.


2 Comments