Why is the ‘Clear History’ Button in Safari Greyed Out on Mac
Have you ever wanted to clear your Safari browsing history on your Mac, only to find that the ‘Clear History’ button is greyed out? This can be both confusing and frustrating, especially when you want to ensure your privacy or resolve some website issues.
In this blog post, we’ll explore why this happens and how to fix it.
Why is the ‘Clear History’ Button Greyed Out?
Before we delve into the solution, let’s consider some common reasons why the ‘Clear History’ button might be greyed out:
- Screen Time Restrictions: Most commonly, the issue is tied to the Screen Time settings on your Mac, specifically the Content & Privacy restrictions.
- System Restrictions: Sometimes system settings may limit access to specific features.
- Multiple Users: If you’re not the administrator on the device, you may not have the required permissions.
The Screen Time Connection
Screen Time is a feature on macOS that allows users to monitor and control their device usage. One of its components, Content & Privacy Restrictions, can limit various functions, including the ability to clear Safari history. Here’s how to resolve the issue:
Open Screen Time
Navigate to Apple Menu > System Settings > Screen Time.
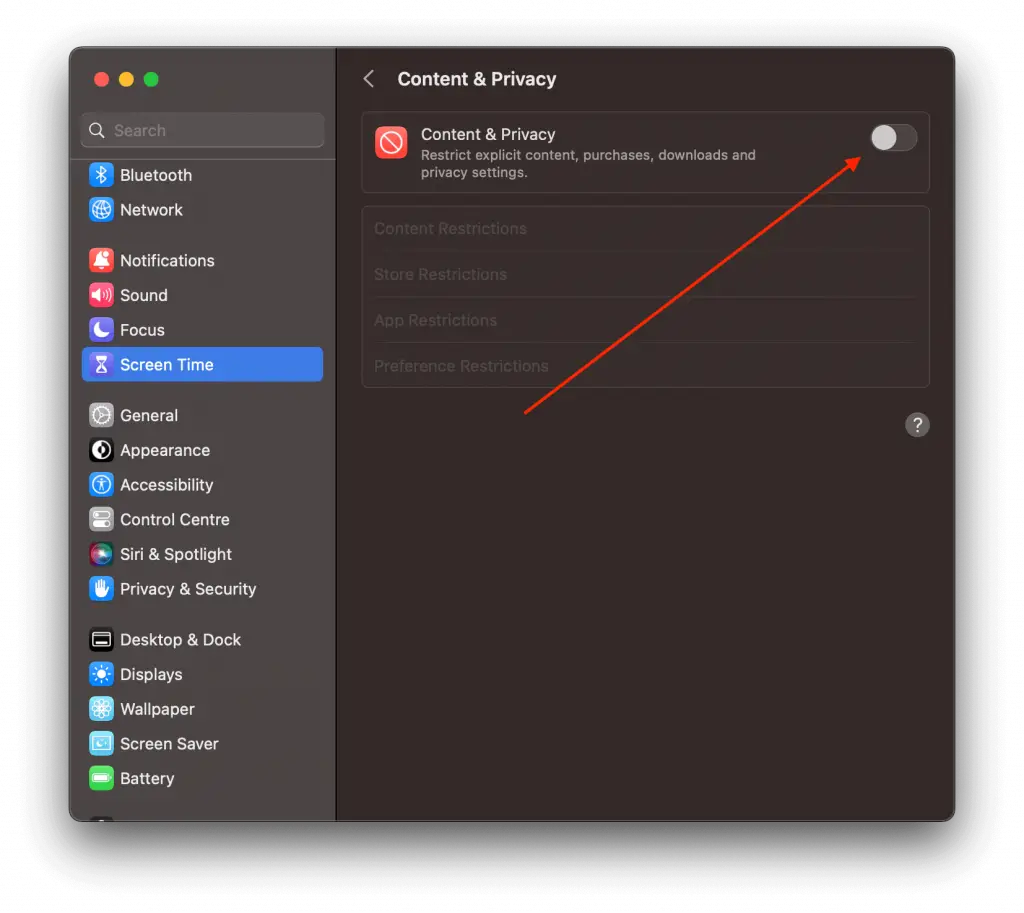
Go to Content & Privacy
Click on the ‘Content & Privacy’ section within the Screen Time.
Disable Restrictions
Click on the toggle button to disable Content & Privacy Restrictions.

Now, the ‘Clear History’ option in Safari should be active again. You can re-enable the Content & Privacy Restrictions after clearing your history if you wish.
Alternative Solutions
If you find that Screen Time isn’t the issue, you might want to:
- Check User Permissions: Make sure you’re logged in as an administrator.
- Update macOS: Sometimes software bugs can cause glitches; updating your macOS could resolve the issue.
Finding the ‘Clear History’ button greyed out in Safari can be a confusing experience. However, the solution is often as simple as navigating to Screen Time’s Content & Privacy settings and disabling the restrictions.
Now that you know the trick, you can regain control over your browsing data whenever you need to.


One Comment